Bocada Cloud has integrated with Autotask using their published REST API to automatically generate a ticket when a backup job and/or data collection monitored by Bocada Cloud fails after a user-specified number of consecutive attempts. To configure the integration to Autotask, follow the steps below.
1 - Add a Ticketing Integration to Autotask in Bocada Cloud
- In the Bocada Cloud left navigation menu, select Administration > Ticketing Integrations > + Add
- Click the Autotask tile
- Display Name field: enter a name for the connection to Autotask which will be displayed in Bocada Cloud. You can name it whatever you like; we recommend it references the “friendly name” you use to refer to the Autotask instance.
2 - Log into your Autotask instance
You will need to log into Autotask to create an API user which will generate the API Integration Key, Username and Secret which are required for the integration to work.
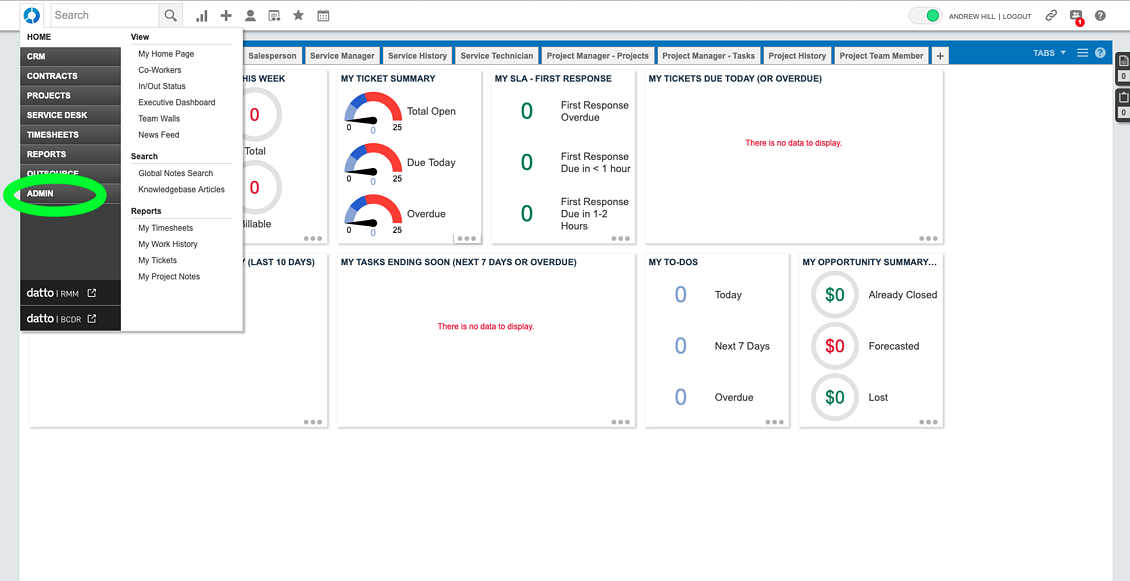
- From the Autotask dashboard, go to the ADMIN menu:
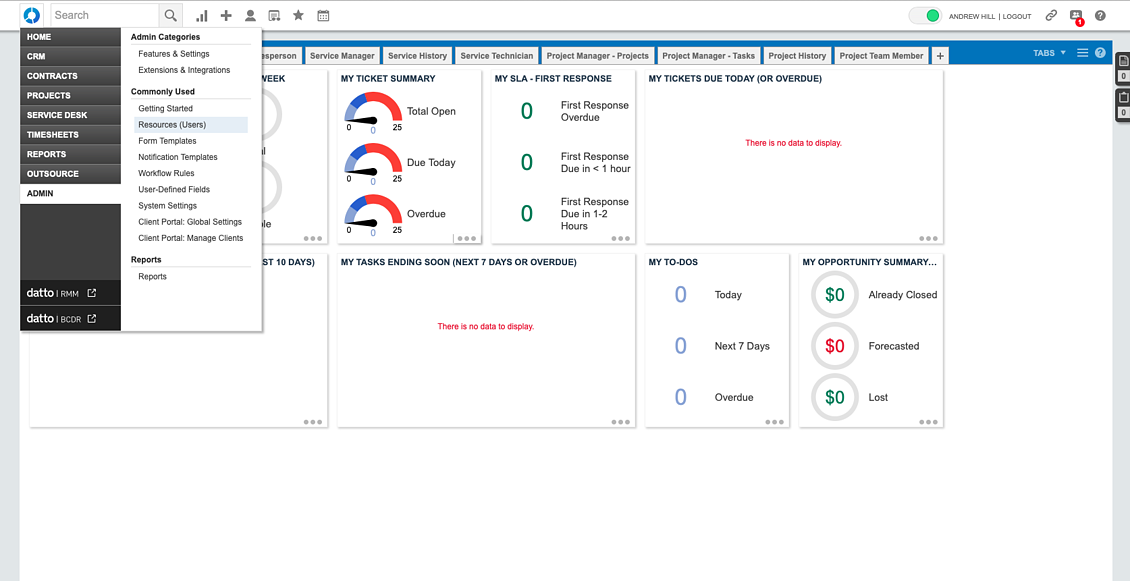
- Select Resources (Users)
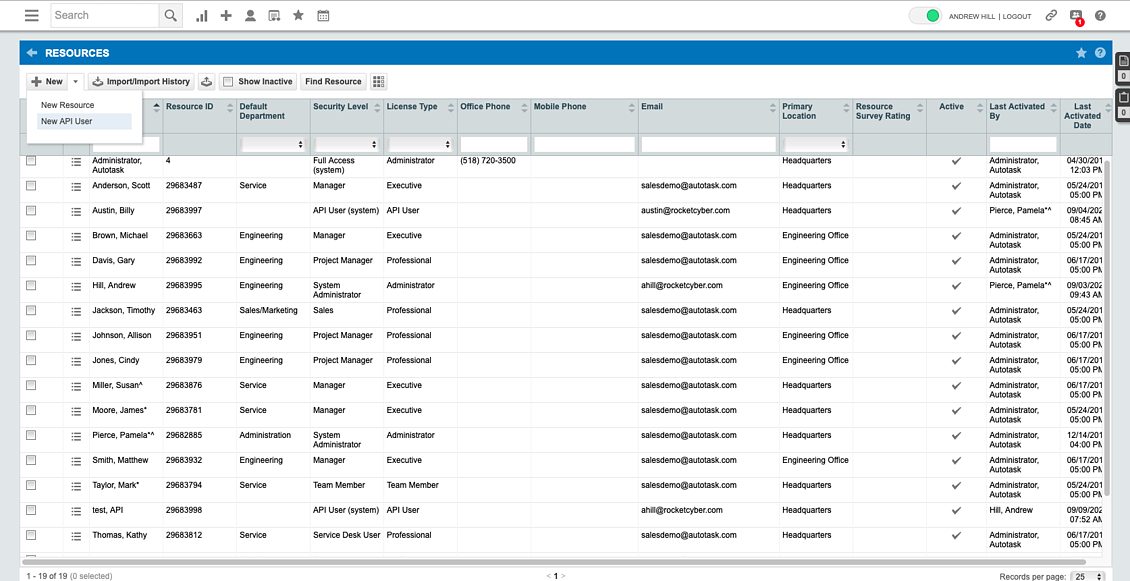
- From the list of existing users, select New API User from the drop-down menu next to the New button
- Enter information for the new API User. Make sure the Security Level is set to API User
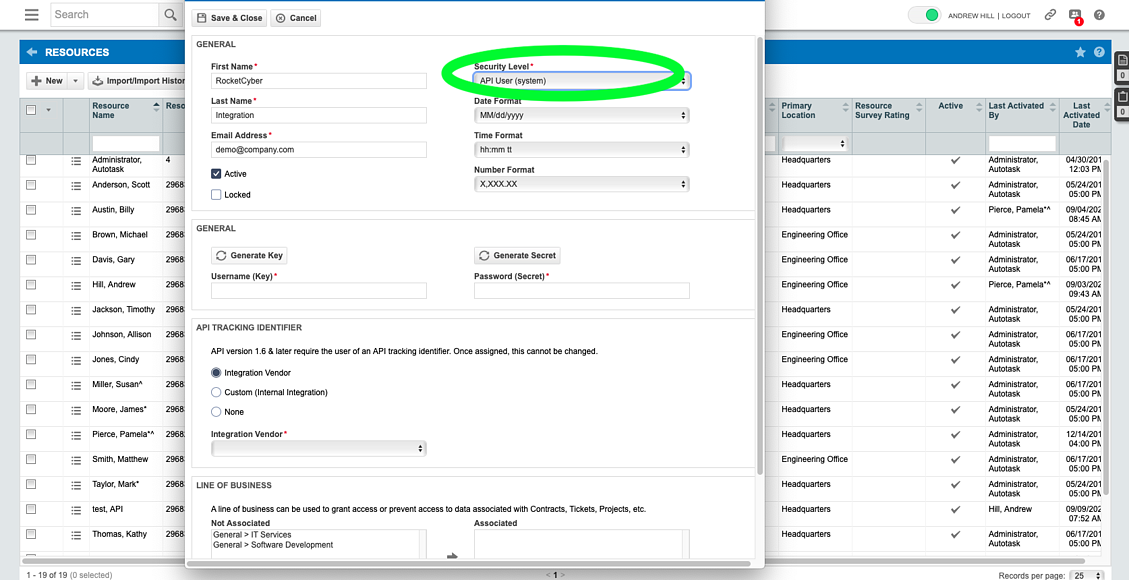
- Click the buttons to Generate Key and Generate Secret. COPY down the Username, Key and Secret - these will be needed to integrate into Bocada Cloud.
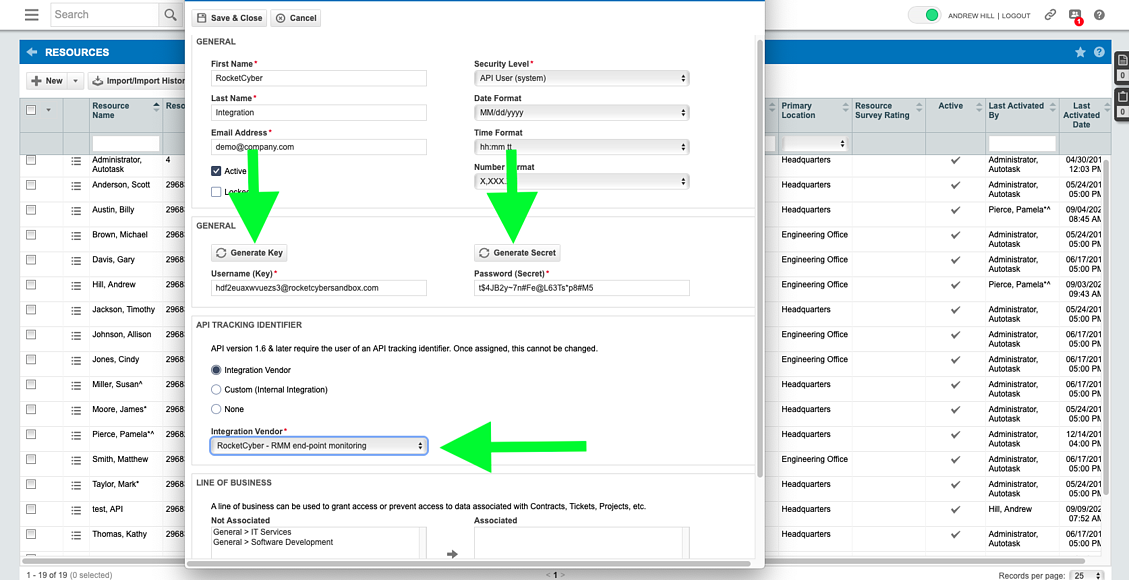
- Under API Tracking ID, use Integration Vendor and find Bocada Cloud in the dropdown list (horizontal arrow in the above picture)
- Grant access for the integration to pull data associated with your Lines of Business
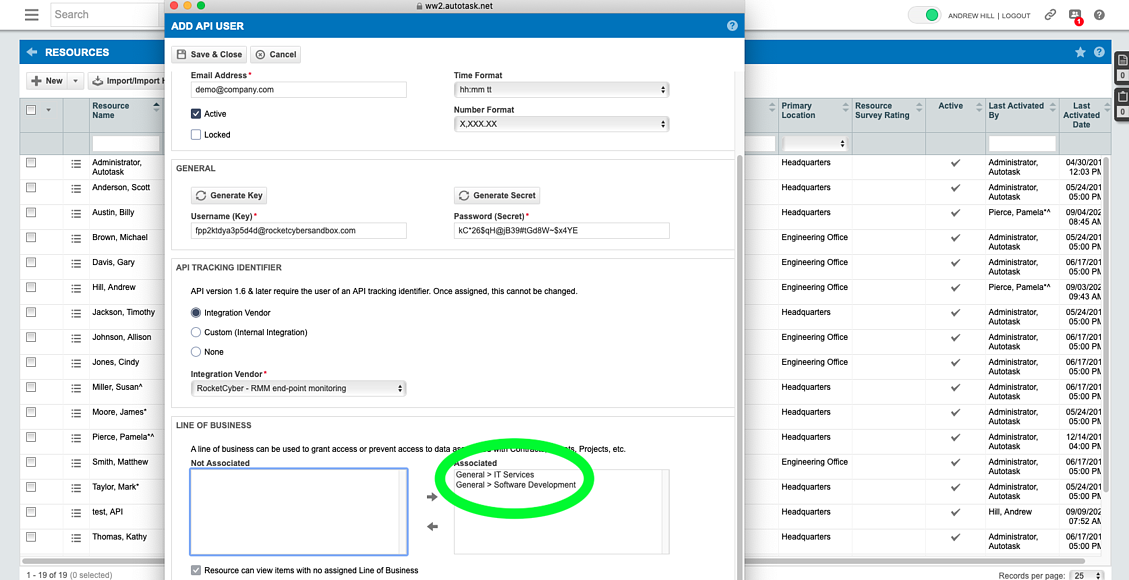
- Click Save & Close
3 - Return to Bocada Cloud to enter remaining information
- Username: paste the Username of the API user you created in the steps above.
- Secret: paste the Secret of the API users you created in the steps above.
- Queue Name (or ID): Enter the Queue (or ID) in Autotask that the opened ticket will be added to. You can view the list of Queues in Autotask by accessing Admin > Features & Settings > Service Desk (Tickets) > Queues
- Due Days: Enter the number of days that will be considered as the due date for the ticket. This is an optional field.
- Company Name (or ID): Enter the Company Name (or ID) in Autotask that will be linked to the tickets opened by Bocada Cloud. This is an optional field.
- Ticket Priority: Select the priority of the tickets opened by Bocada Cloud in Autotask. This is an optional field.
4 - Verify Connection
After completing all fields on the ticketing integration page, click the Verify connection and create a sample ticket button to verify that the communication is working between Bocada Cloud and Autotask. If successful, you will see a confirmation message and test ticket number. Look in Autotask to verify the ticket has been created.
If you receive an error message after trying to verify the connection, review the data you entered to make sure it is correct. If you are still experiencing issues, create a support ticket in Bocada Cloud to get additional help.
5 - Set up and Save a Ticket Trigger
After you verified that the connection between Bocada Cloud and Autotask is working, create a trigger to automatically generate an incident when a backup job or data collection fails.
- Click the Set up a Ticket Trigger button on the confirmation page after configuring the integration with Autotask. Or, on the left navigation menu, select Administration > Ticketing Integrations > List and click the Add Ticket Trigger icon for the Autotask integration you just set up.
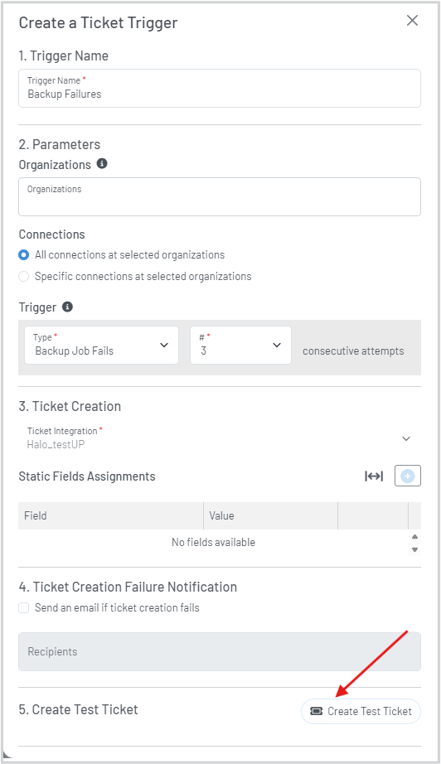
- Trigger Name - create a name for this ticket trigger which will display in Bocada Cloud associated with the connection to your Autotask instance. You can create multiple triggers for the same Autotask connection; therefore, enter a name that will describe the type of trigger you are setting up (e.g. Backup job failure tickets).
- Parameters: Organizations - select the Organization(s) this ticket trigger will be set up for which identifies the list of connections to backup applications to choose from.
- Parameters: Connections - choose whether the ticket trigger will apply to all or only specific connections to your backup applications.
- Trigger: Type - select whether this ticket trigger will be generated based on a Data Collection Failure or a Backup Job failure.
- Note: you can set up multiple ticket triggers for a single connection to Autotask. Once you create a trigger for one type of failure, you can add another trigger for a different type of failure.
- Trigger: # - select how many consecutive attempts before the ticket is generated (e.g. a backup job fails 3 consecutive times and then a ticket is generated in Autotask).
- Ticket Grouping - these options give you greater control and flexibility in terms of how you would like the tickets to be generated to match your operational workflow. For example, you can group backup failures into a single ticket, or generate individual tickets for every failure.
- Ticket Creation Failure Notification - optionally, you can choose to receive an email notification if the creation of a Autotask ticket fails. If you select this option, enter the email address(es) of the recipients of the notification.
- Save the trigger - click the Save button to save the ticket trigger. You will need to save it before you can create a test ticket. Once saved, the trigger will appear on the Administration > Ticketing Integrations > List page, under the Autotask integration. Click the down arrow to display the list of ticket triggers.
Note - Updating Tickets: Rather than generating a ticket every time the ticket trigger rule is met, Bocada Cloud will update the original ticket if there is a subsequent failure for the same resource. It will not generate multiple tickets for the same failure on the same resource to avoid unnecessary "noise" in your ticketing system.
Note - Auto-Closing Tickets: if you have chosen to have tickets automatically closed (an option on the HaloPSA integration configuration page), then Bocada Cloud will close a ticket it created for a failure if that failure is resolved on a subsequent attempt. Auto-close is only available to customers subscribed to the Ultimate plan.
If you have any issues or questions about integrating with Autotask, create a support ticket in Bocada Cloud or Contact Us.